
How to Add a Portable Solar Cell System to Your RV
How to Add a Portable Solar Cell System to Your RV
By: Morey & Ruth Edelman
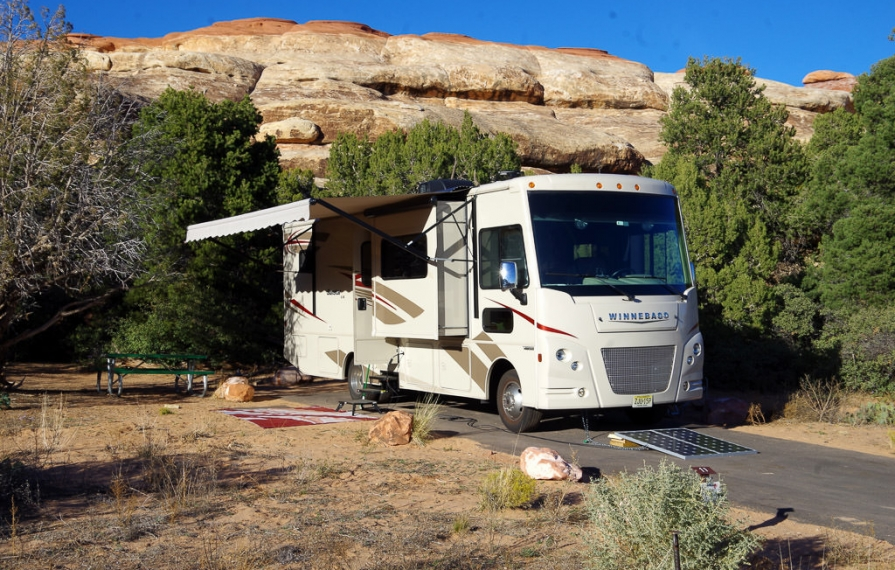
Having RVed in a Winnebago 30-ft motorhome for the past seven years, and loving to camp at National Parks, National Forests, and Bureau of Land Management sites, we have gotten used to not having hook ups. Running our onboard generator for three hours a day has been our standard practice to keep our batteries charged for the next 24 hours. But, we don't like to add noise in these pristine places. And we like to be out doing things, not tied down at the campsite while we recharge.
Adding a portable solar cell system is the solution. Our dream was to pull into a site, pull out our portable solar cells, set them up in a sunny location, plug them into our batteries, and we'd be ready to enjoy the area, (and not recharging every day).
When investigating the components required, we discovered there was a lot to learn! Now, having worked through the design and installation challenges, we discovered that it's not difficult. So, since we have already sifted through all of the information and specifications, we wanted to share a simplified solution.
(Editor's note: These instructions and tips are suggestions from an owner of a Winnebago product and trusted GoLife contributor, not a professional or a Winnebago Industries employee. Any changes you make to your RV will be done at your own risk.)
Step 1: Determine power requirements
Usually, 200 to 400 watts of generating solar cell panels will be sufficient to recharge the RV's batteries (assuming the sun shines). While 200 watts would be the minimum for basic power needs, including LED lighting, propane refrigerator electronics, and a radio. Add a television, more lighting, and other electrical needs; and you'll need closer to 400 watts.
You can more accurately calculate your requirements by matching the power output (amps) of the solar cells with the power requirements (amps) of your motorhome, but we're trying to keep this "simplified." However, our recommended system does allow for additional solar cell panels to be added later, if required based on your power usage.
Step 2: Understand the basics for system design
We will list all the components next, but first you need to understand the basic system.
Solar cells are outside enjoying the sunshine. Wires carry the power to a charge controller located in your RV. Then the wires run from the charge controller to your coach batteries. Other than some fuses to protect your RV electrical system, it's that simple!
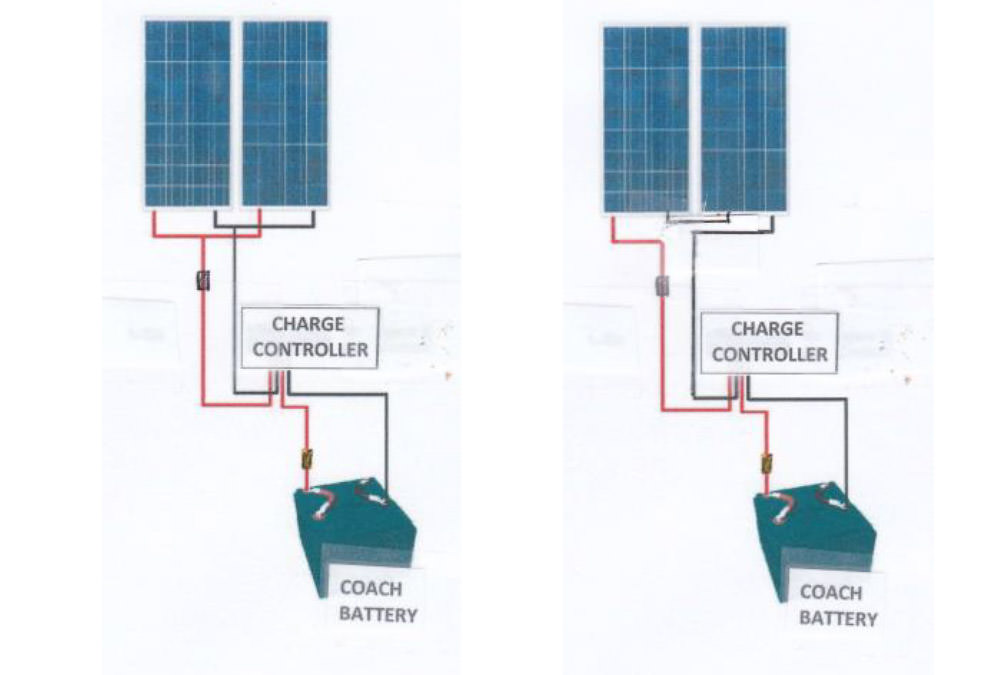 Parallel System (left) vs. Series System (right).
Step 3: Choose system components
This is where you balance costs with performance. A 200-watt system can be completed for under $300. We chose higher efficiency components, but still kept the cost under $400.
Basic System:
- Two 100-watt Polycrystalline Solar Panels
- 20-amp PWM Charge Controller
- Two 20-amp fuses, (one inline MC4 fuse)
- Wires with MC4 connectors
- Wires with ring connectors
Recommended System:
- Two to four 100-watt Monocrystalline Solar Panels
- 30-amp MPPT Charge Controller
- Two 30-amp fuses, (one inline MC4 fuse)
- Wires with MC4 connectors
- Wires with ring connectors
- Zamp Outlet on RV & MC4-SAE adapter
Solar Cells:
We purchased two 100-watt, framed 22" x 47", monocrystalline solar cells. We could have reduced our costs by 20% if we had purchased polycrystalline solar cells, but polycrystalline cells are not as efficient, and won't generate as much power from the same sunshine. Monocrystalline panels are over 22% efficient, while polycrystalline cells are in the 14-16% range.
There is now a choice of purchasing lightweight flexible polycrystalline solar panels. These could have been used to reduce the weight of our portable solar array, but we would have needed to build a frame, and these are not as solar efficient.
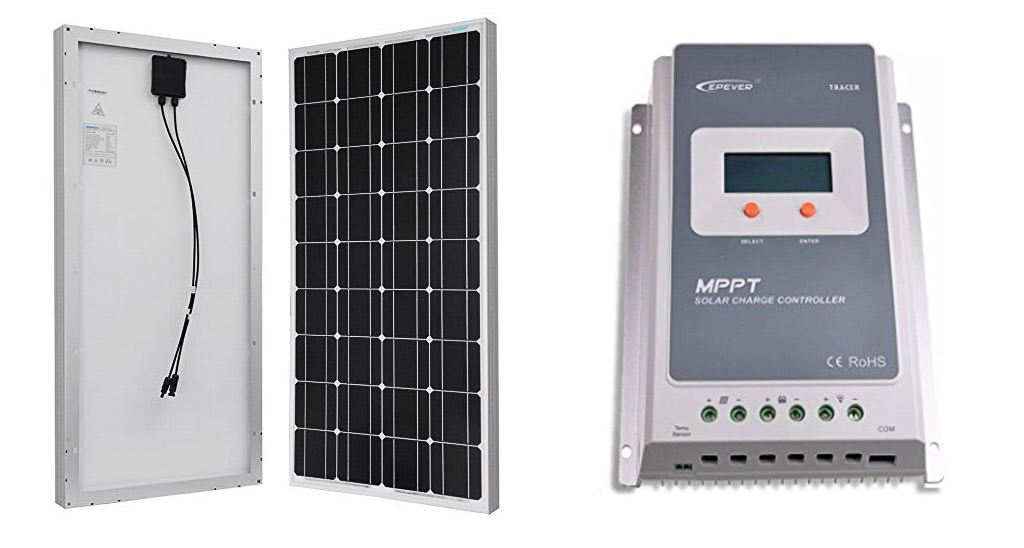 100-watt solar panel and MPPT charge controller.
Charge Controllers:
Again we went for the higher priced, but more versatile and efficient unit. We chose a 30amp MPPT controller. For a 200-watt system, a 20-amp controller would be more than sufficient (one 100-watt solar cell generates under six amps). But we chose the higher amp rating so we could add additional solar cells in the future.
A MPPT charge controller can be twice the price of a PWM charge controller, and both function well in a solar cell system. We chose the MPPT unit because it transfers more power, particularly in cold temperatures (20% to 30% more power in cold temperatures, and 10% to 20% more power in hot temperatures). The MPPT controller also allowed us to wire the two 100 watt solar cells in series generating 24 volts, which this controller can handle. This allowed us to use a lower gauge (thinner) electrical wire, and allowed us to run longer wires from the solar cells with less power loss in the wiring.
A PWM charge controller requires the solar cells to be wired in parallel generating 12 volts; not a huge negative. We could have saved some money, as many of the prebuilt solar kits use a PWM charge controller, but we wanted to use an upgrade in our system.
WARNING: When choosing a charge controller, be sure it is a "negative ground" unit. If the controller is a "positive ground" unit, it could short out if it is mounted to a grounding plate in your motorhome. We avoided this possible problem by mounting the charge controller to an insulated board which was then installed in our motorhome.
Wires & Fuses:
Solar Cell Panels come with MC4 connectors on the output wires. These are single contact electrical connectors which are used on all solar panels. We used 30-foot wires to connect the solar panels to our charge controller (located in our RV). We ordered these wires with a MC4 connector on the end to be used to plug right in to the solar panels. Since we are using a MPPT charge controller and a series wiring setup, we have the capabilities to add additional wire if the campsite requires it to capture the sunshine.
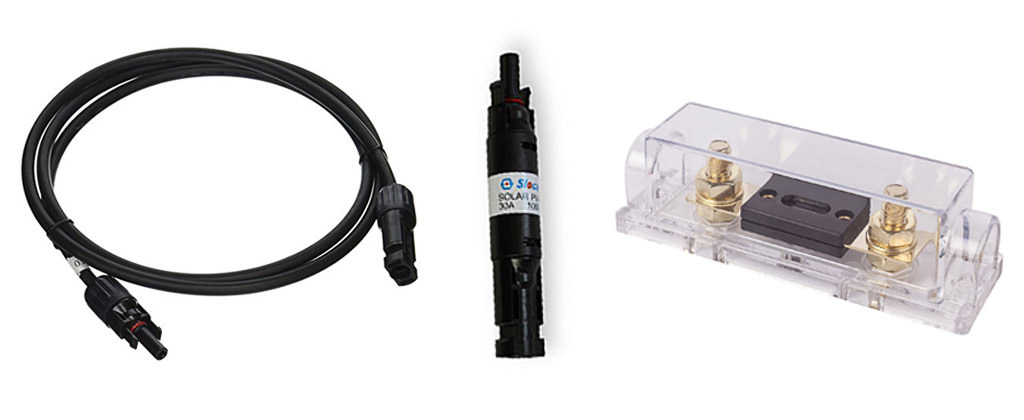 Hookup wire with MC4 connectors, inline fuse with MC4 connectors, and a ANL fuse set.
Ten-gauge wire was used from the charge controller to the RV coach batteries. Purchasing these wires with ring connectors made for a more secure connection to the batteries.
As fuses are extremely important to protect your electrical systems, an inline fuse was added at the output from the solar panels. An inline fuse is available with MC4 connectors, so it "plugs" right into the wires from the solar panel. A second fuse, a Renogy 30-amp ANL Fuse Set, was placed between the charge controller and the coach batteries.
A Zamp sidewall port was used for easy plug-n-play with the solar panels. This sidewall port uses a SAE plug, so we were required to add a Renogy MC4 to SAE adapter, so the wires coming from the solar panels could be plugged into the Zamp port.
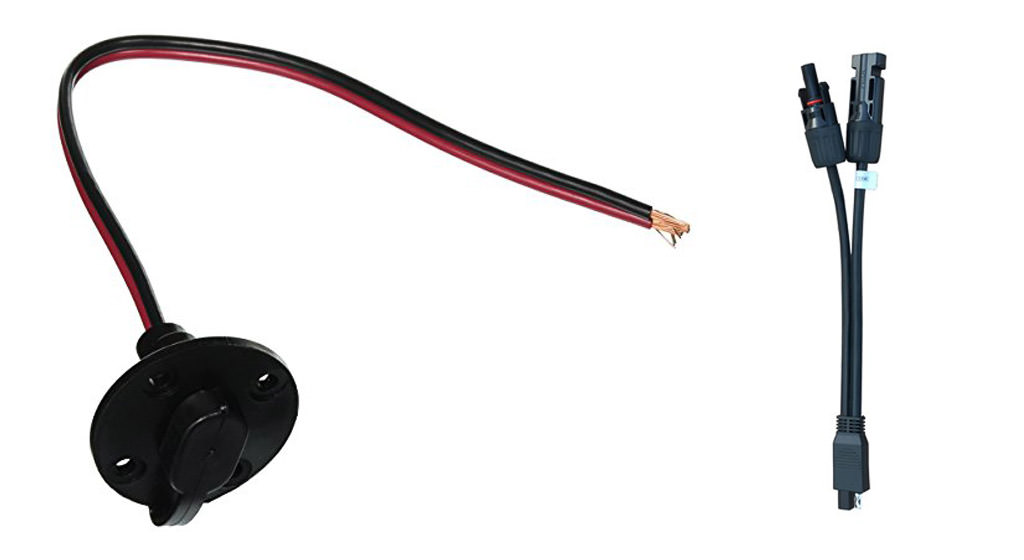 Hookup wire with MC4 connectors and MC4 to SAE adaptor.
Step 4: Assembly & installation
Our completed goal is to keep it simple and easy to use, so we kept this in mind when we went to work.
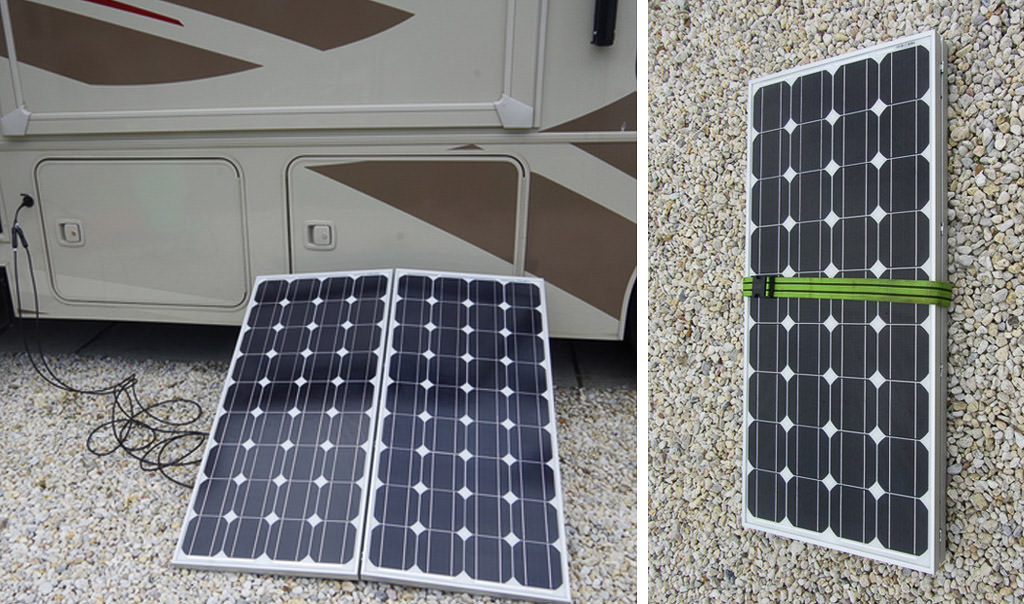
First, we wanted to make the solar panels easy to handle, as their size (22"x 47", 1.5" thick) and weight (16.5 pounds each) could be awkward to carry. Our solution was to purchase a couple of piano hinges at the local hardware store, drill some small holes through the aluminum frame of the panels, and mount the hinges. This allowed for the panels to be easily stored, and then folded open for use. We opted to use a nylon suitcase strap to keep the panels together during storage. For added convenience, on the aluminum frame, a handle could be mounted along with a latch to hold the panels closed for storage. (Be aware that drilling holes in the frame could void the solar panel's manufacturer's warranty.)
Next, we needed to determine where the charge controller would be mounted. Since the controller is not weatherproof, it needs to be mounted in an enclosed out-of-the weather location. The controller should be easily accessed since there is a digital display which lets you monitor your system. The ideal location would be inside your motorhome near your other monitoring gauges. For us, not wanting to tear into interior walls, we opted for mounting the charge controller in a storage bay with easy and close access to our coach batteries, which are located under our entry steps.
To avoid any electrical grounding problems, we first mounted the controller on a PVC (plastic) board. We also mounted the ANL fuse just below the controller. Then we fastened the PVC board to the inside back of the storage bay.
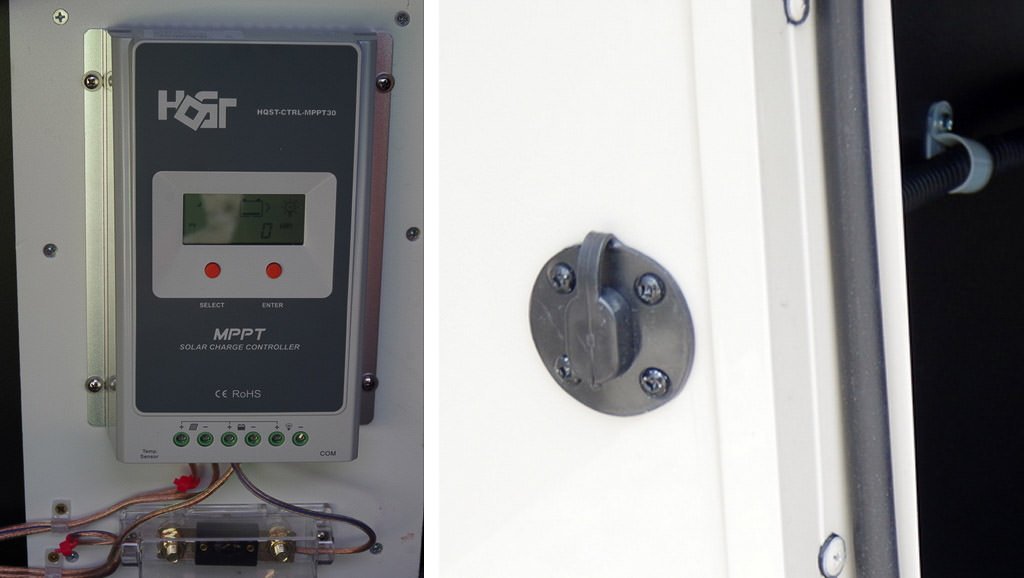 Left: Charge controller mounted to back of storage bay. Right: Zamp connector installed.
With the charge controller being mounted in the storage bay, we could have attached the 30-foot wire, with the MC4 connectors, directly to the controller. Since we wanted to be able to close the storage bay door and did not have a small access door to the outside, we added a Zamp outlet which is specifically for RV solar systems. All it took was a hole, some silicone, and four screws, so the outlet could be installed.
The only thing left to do was to run the wires and hook up the system. First, we spliced some ten-gauge wire to the Zamp outlet and hooked up these two wires to the charge controller.
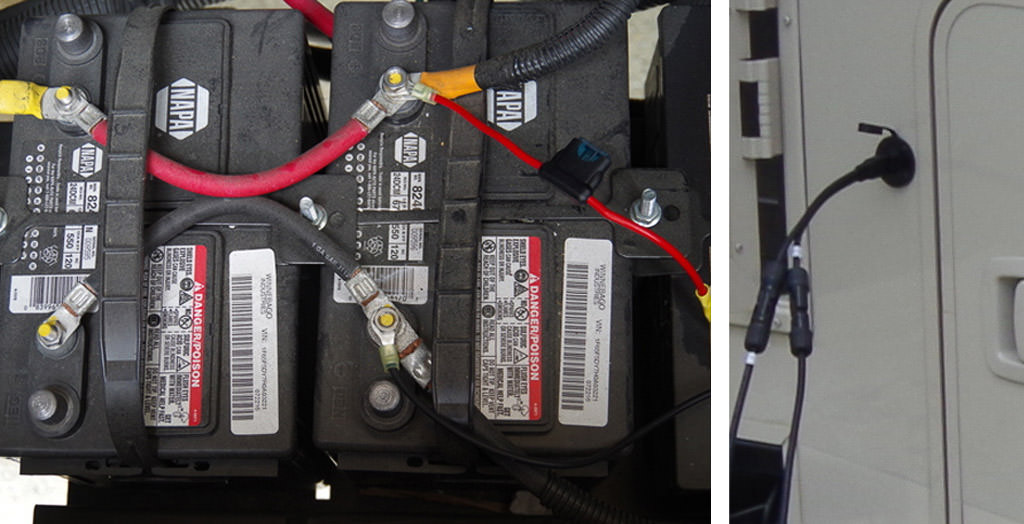 Left: Battery bank. Right: Zamp outlet with MC4-SAE adapter.
Next, we ran the two wires, with the ring connectors on one end, to the coach batteries. We drilled a couple of 3/8" holes in the side of the storage bay toward the battery compartment. We used plastic grommets in these holes so the metal would not tear into the wire insulation during travel and short out the system. For added protection, we also added silicone after the wires were run through the grommets. Finally, we hooked the wire to the batteries using the ring connectors, and hooked the other end of the wires to the charge controllers.
Step 5: All finished!
If not done earlier, now it's time to review the charge controller's operation manual. Plug in the solar panels and start powering up the motorhome's electrical system.
If you don't want to build your own system, there are numerous options available including a prebuilt "suitcase" solar panel system. Once we understood what our electrical requirements were, our biggest challenge was not how to design the system, but specific to our motorhome, where to locate the charge controller and how to run the wires.
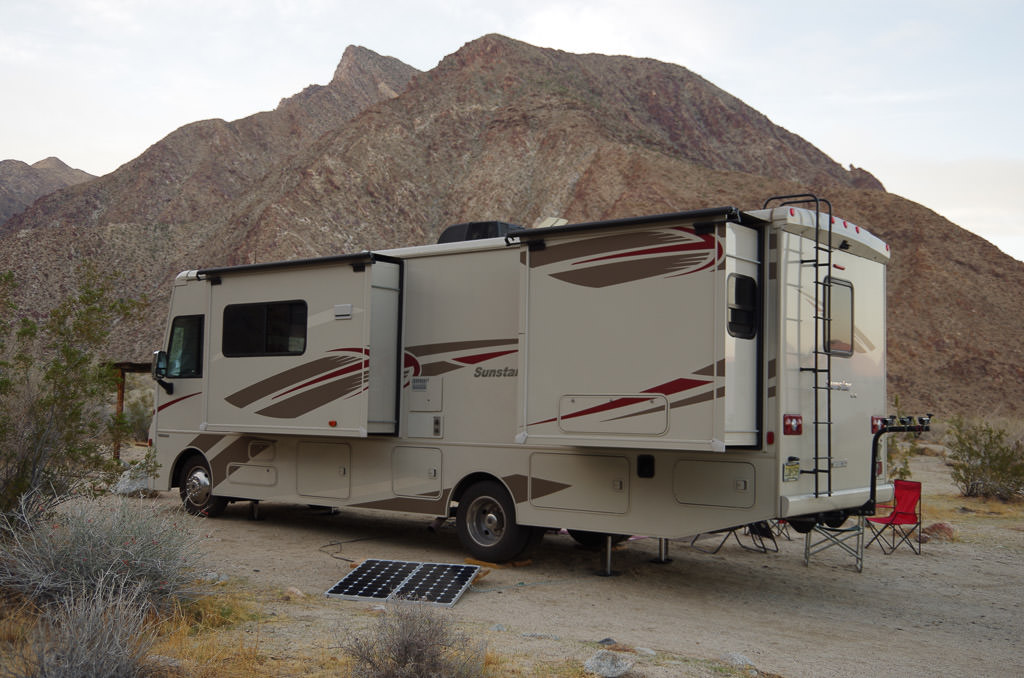
Having now used our "portable" system for the past three months, we are more than pleased with the performance. Four to six hours of sunshine is all it takes to fully charge our coach battery bank. Since we had just traded in our older Winnebago for a new 2017 Winnebago Sunstar XL, it was the perfect time to go solar!
Want more detailed information on solar? There is a wealth of information available. In fact, so much, that it can be overwhelming. Start by checking out the following companies for products and information:
- Renogy, www.renogy.com, 800 330-8678.
- Zamp Solar, www.zampsolar.com/RV-solarkits, 541 728-0924
- Windy Nation, www.windynation.com, 805 323-6445
Many of the items required to complete this project are also available from Amazon and Ebay. (Note: We did not receive any compensation from these vendors for this article.)
Comments
Comments on this post are moderated, so they will not appear instantly. All relevant questions and helpful notes are welcome! If you have a service inquiry or question related to your RV, please reach out to the customer care team directly using the phone numbers or contact form on this page .